
Georgi Tsaklev
Programmer struggling with artIndie Startup (IGD740) - Essencebound
IGD740 Indie Startup
Published on January 01, 2022
- About the project
- Brainstorming & initial research
- Initial project setup
- Camera
- Movement & navigation
- The Inventory System
- The Dialogue System
- Game progress & data storage
- Animation & Cutscenes
- UI & Accessibility
- Level Design
- 2D Art
- Sound & Music
- Document contributions
- Collaboration & Workflow
- Bugs & Polish
- Marketing
- Pitch
- Conclusion
- References
About the project
For the Indie Game Startup course, also known as IGD 740, I've joined forces with Michael Heard, who is focusing on 3D art and Luke Quinn, who is focusing on Game Design and Writing. Their areas perfectly complement my focus on system design and programming, so we decided to team up for this course and ended up calling the team "Curious Penguin Games".
In this project, I set myself a couple of goals to drive my abilities as a Game Developer further. Firstly, I wanted to keep the development cycle light. As a programmer, I wanted to output very simple-to-use components which can be utilised to their full extend even from non-programmers. Additionally, I wanted to keep the change iterations quick and easy to make keeping the efficiency high. Secondly, I wanted to keep all systems in the game as separate as possible. While it is a prototype, I wanted to have a solid foundation that doesn't have a series of obscure requirements for it to work as many of the game jam games we have all created.
This blog post focuses on my work towards the prototype together with progress screenshots and short descriptions of the different tasks I've completed. It is important to note that the list is not exhaustive - the work I've done on the business plan for the game and small pieces of work here and there I likely forgot to record will not be present, however, it should cover most of my work.
The structure of this document is based on key areas - work is combined in self-contained sections covering all my work towards a given topic. I felt this way the progress on certain systems can be presented in an easier way instead of being split along multiple weeks.
With that aside, meet Essencebound.
Brainstorming & initial research
The team started brainstorming rather early - before the course has officially started. This meant that we weren't fully aware of all requirements by the course at that time. We came up with two ideas. My suggestion was an exploration game where the hook is the player movement as well as the collection of flowers and creatures. The idea was decided against as it seemed a bit more niche and harder to market. The second idea (which came up to be Essencebound) came from Michael and started from a story. While exploring the idea we've drawn inspiration from the work of DONTNOD Entertainment (2022) and games such as Trine (2009), Pathfinder (2018) and The Wolf Among Us (2013) to end up with the 2.5D Point and Click Narrative Adventure. The decision was driven by the simplistic controls of the genre and the simplification of the art for 2.5D versus the art for a full 3D game.

As you will find out later, we correctly identified the ease this genre will give us in the development of the prototype, however, we didn't account for the time it will take to build the whole narrative of the game. Additionally, our business plans were driven by this decision rather than the other way around. Thankfully, the game idea showed potential in our research which stopped us from pivoting away from it. Additionally, this thought us a very valuable lesson in the value of improving on a given genre to improve the odds of the game being a success.
Initial project setup
Once we were ready to start working on the game I've set up a GitHub (2022) repository and created a new Unity (2022) project. Since the start of the project, we've started using some paid assets from the Unity Asset Store (2022) and hence made the repository private to comply with the license agreement of these packages. Similarly to previous projects, I've set up the repository to utilise my personal Git LFS server which allows the team to go way beyond the GitHub free storage tier without paying an extortionate amount of money for very little storage every month. Additionally, my server integrates seamlessly with the GitHub Desktop client, meaning there is zero setup required by individual members and it is all transparent to them.
Camera
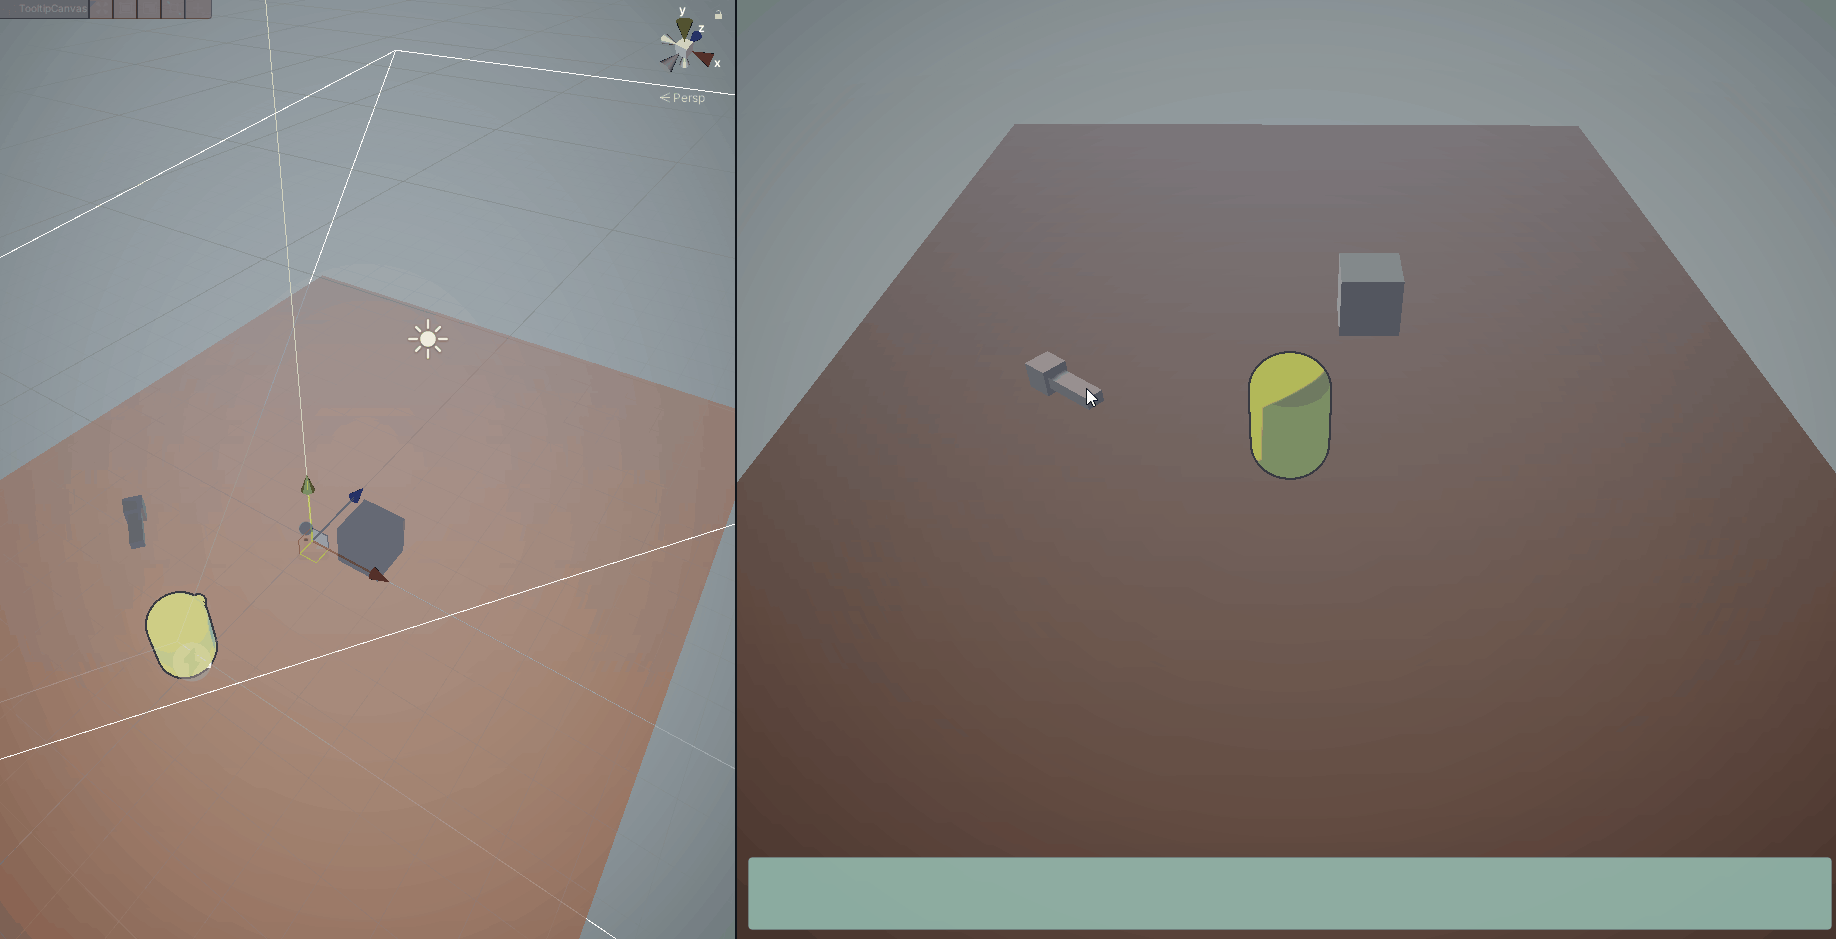
Since the game is a 2.5D side-scrolling game, I knew the camera will need to move as the player does through the level. To achieve this, I've utilised the Cinemachine (Unity Technologies, 2022) camera and the in particular the Dolly Track variant of it. It allows the developer to define a path which the camera will follow. Additionally, I was able to set it up so that the camera automatically decides its position along the track so that it is in the closest position to the player.
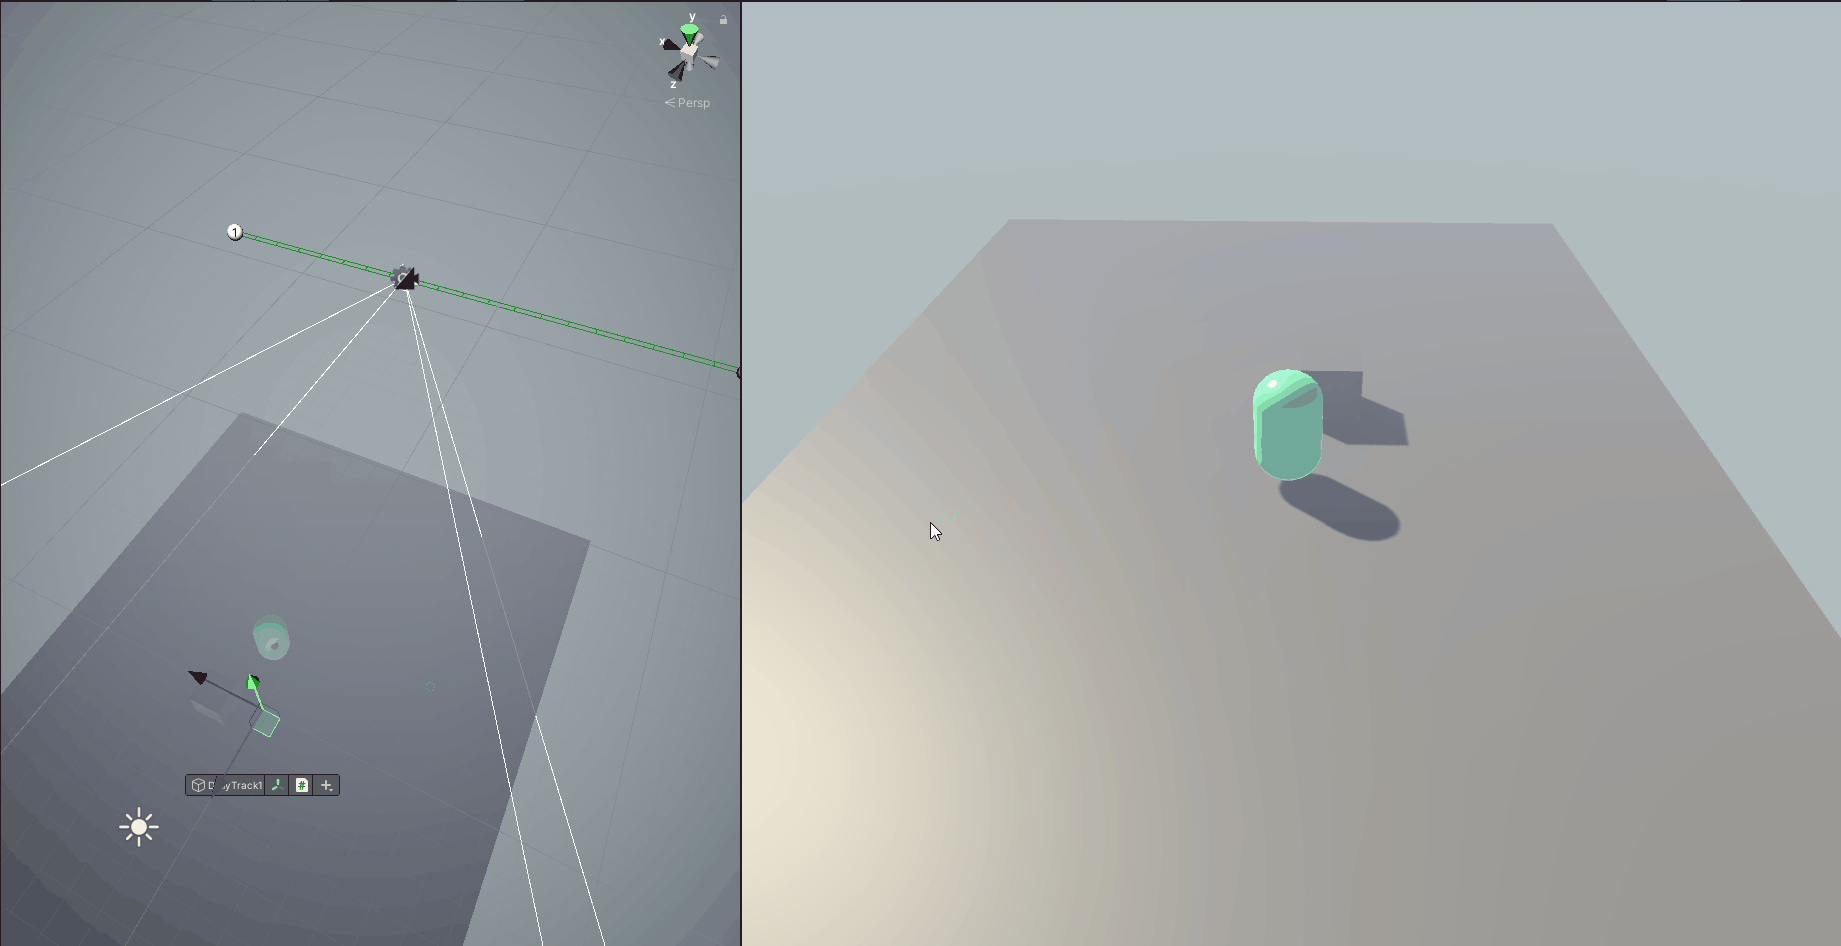
Later I've added the ability to have secondary Dolly Tracks across the level, switching automatically to them when the player enters a certain area. These tracks got utilised in a couple of places across the prototype where the levels aren't perfectly linear or where the focus of the camera needed to be in a specific place.
One common feedback received by our testers was that the camera is pointed too much towards the ground. The camera target has been the player and in particular the pivot point of the player, which is at Aria's feet. Giving the camera a new target to focus on towards the head of Aria made the game much more enjoyable and easier to play and we stopped receiving this feedback since then.

Movement & navigation
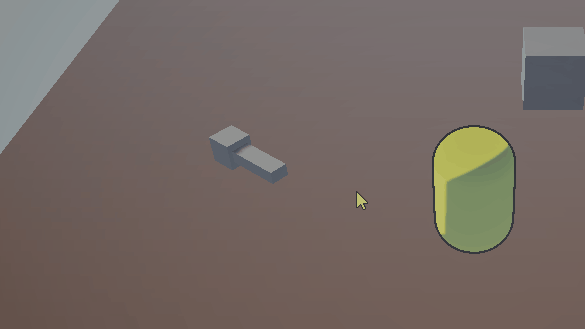
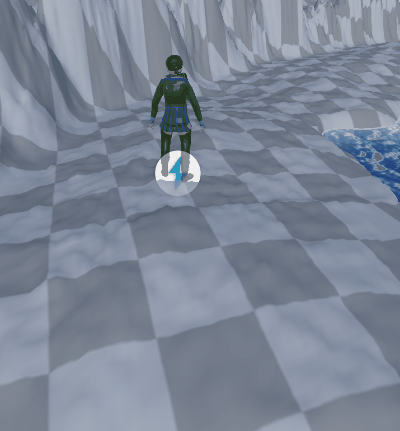
The character movement of a point & click game is fairly simple - the player clicks on a location and the character does its best to reach the destination. Conveniently, Unity has a great feature called NavMesh (Brackeys, 2018) - it allows baking a navigational mesh allowing movement and pathfinding on it in an extremely easy way. See the GIF in the Camera section for a preview of the movement.
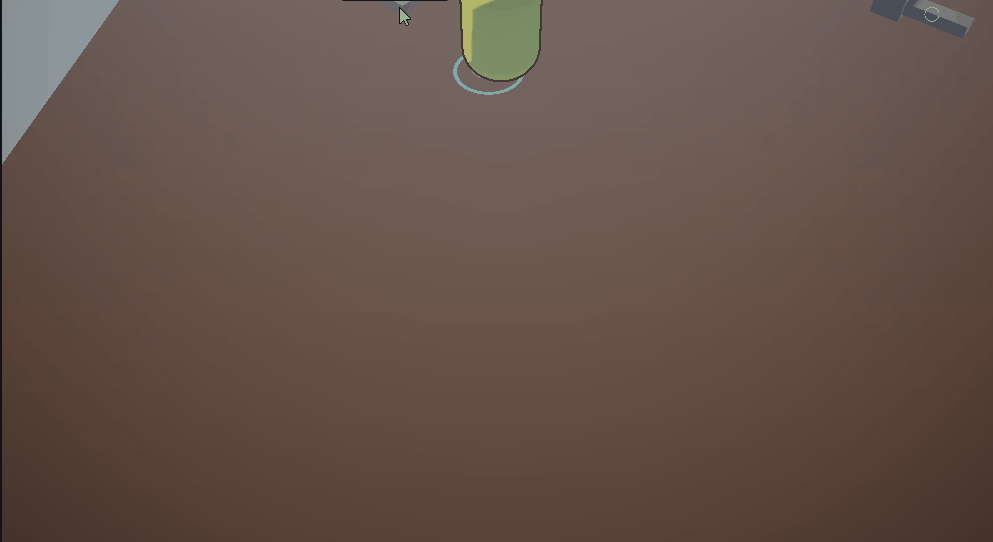
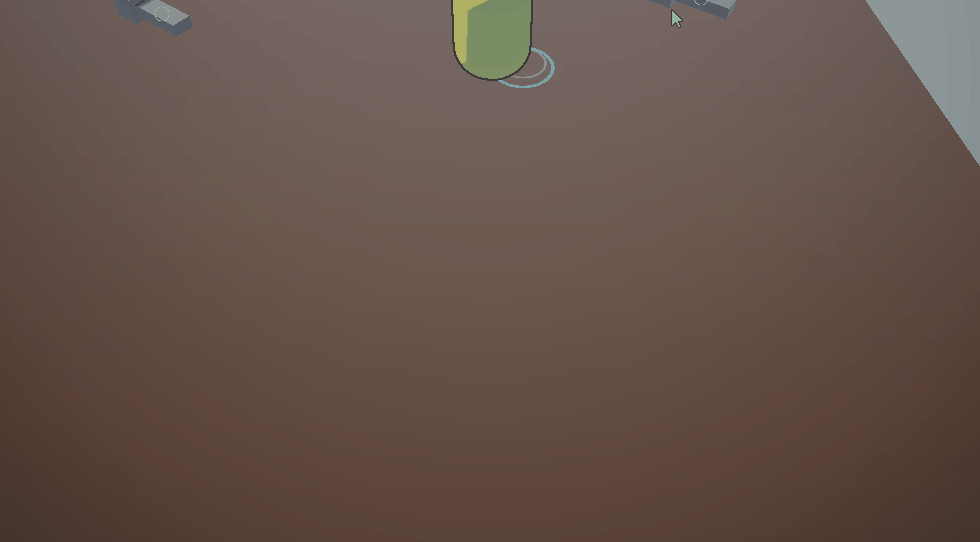
Once I've implemented the character movement, I've added a ripple effect by following the Ripple Effects tutorial by Abhinav (Abhinav a.k.a Demkeys, 2017). It is a very simple method of implementing such effects, however, the way I've implemented the Raycasting meant that sometimes it appears at a weird angle. I have since tried to improve on it and while it is still not perfect, it is a solid foundation for the prototype.
Another core feature for many games is the ability to move across scenes. It is important as it allows parallelisation of work as scenes are hard to merge and allows for many tiny loading screens instead of one extremely long.
To implement it, I creates a zone that will trigger the navigation and created an overwrite of the Interactable component as it was already integrated with the player and I didn't have to change anything else in the game. This overwrite (subclass) was notified when the player interacted with it and would trigger navigation to the next scene. Because I reused the Interactable component, I got tooltips and highlighting on the zones for free!
Once the transition was implemented, I noticed items reappear once the player navigated back to the level a second time. To resolve the issue, I implemented a cleanup behaviour that checks if an item has been collected and removes the Game Object associated with it. This behaviour was further extended later to support different types of cleanup - destroying the current Game Object (mentioned above), destroying a different Game Object or just disabling the Interactable component.

The next step was to correctly position the player at the "entrance" to the given area. To implement this, I scan the new scene for all navigation areas and find the one which leads to the scene the player just left and then place the player at the navigation zone. This simple trick makes it more believable to the player rather than starting at the centre of the scene each time.

Finally, I've added a transition fade-in/fade-out when moving across scenes to make the transition look more polished.
Implementing this feature highlighted a new problem - the player, the camera and the UI needs to be present in every single scene. However, some systems needed a reference to said components and if we constantly create/destroy them it would be a problem. My solution, while not perfect, worked well - I created a component called KeepAcrossScenes. It marked the Game Objects it is attached on as DontDestroyOnLoad which tells Unity to move them to a new scene (created at runtime) and they are not destroyed when the player changes scenes.
This created a brand new issue - after navigation, the player, the camera and other such objects existed twice in the scene. I could only have them in one scene, however, this would make development slower as we will have to add all those objects while developing and will have to delete them before finishing our work. As mentioned, one of my key pillars was to keep development as smooth as possible, so instead, I extended the KeepAcrossScenes component and made it clear out those additional objects from the scenes after navigation.
In retrospect, a better solution might have been to create a scene with those objects and have it loaded alongside the "level scenes". However, the current solution once set up works well and it is easily extendable with more scenes.
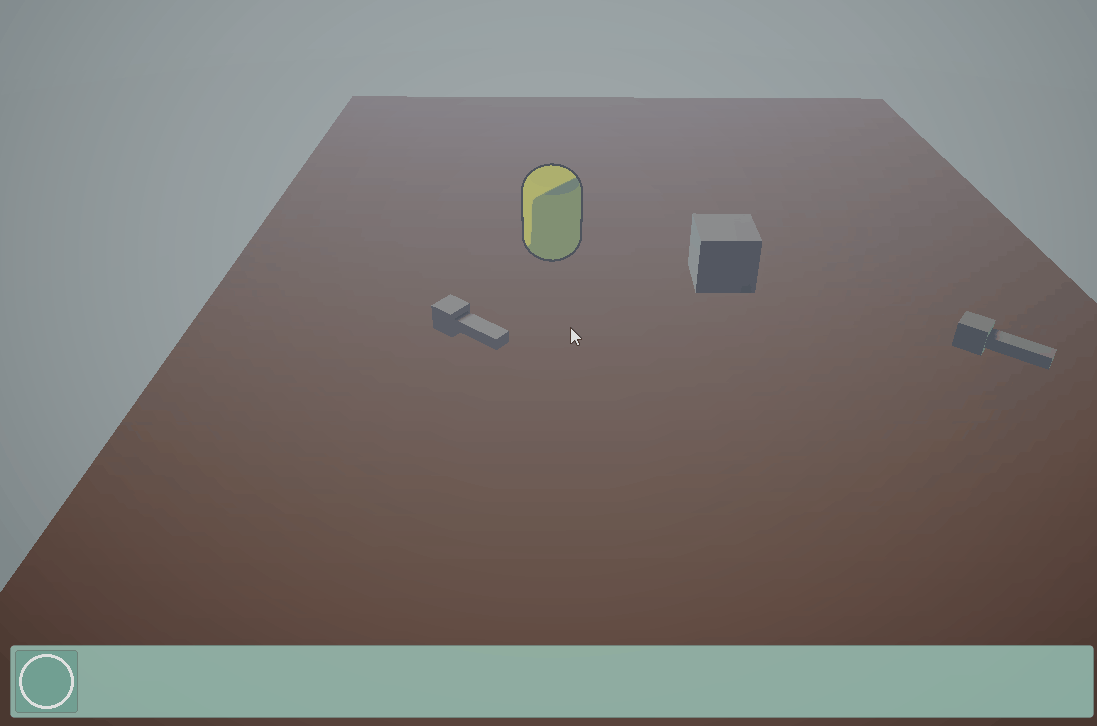
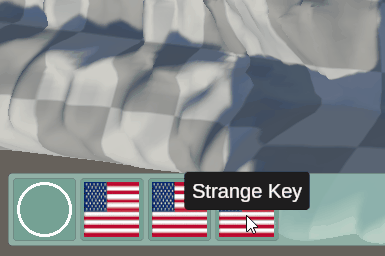
The Inventory System
One of the core systems in a Point & Click game is the inventory. It covers the ability of the developers to define items in the game which can be collected and used by the player as well as the ability of the player to use said items in the game. The inventory structure I've used has been inspired by the Unity3D - Scriptable Object Inventory System tutorial by Coding With Unity (2019), which I've simplified to remove the ability to create stacks of items. Additional functionality has been implemented by the abstraction layer, but more on that later.
Firstly, after creating the basic data structure for the inventory, I've mocked a UI for the inventory to allow me to render the contents.

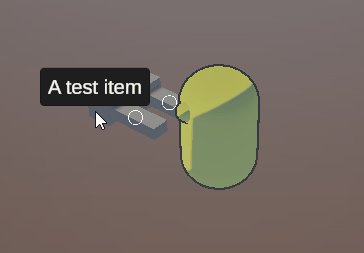
The next step, of course, was to add the ability for the player to pick up items from the ground which involved creating one core component that ended up used across every single corner of the game - the Interactable component. This component at this point only focused on items, however, as the development of the game progressed it got extended with support for dialogues, dialogue pre-conditions (explained later in the blog) and even custom destruction behaviour and sound.
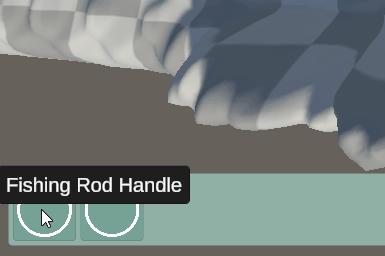
Next, I work on adding tooltips to the items, both in the game world and on the inventory UI.
However, I wasn't happy that the tooltips exit the screen, which is a common occurrence when working towards the edge of the screen. To resolve this, I clamped their position and just like that, the tooltips were perfect!
The last key change in this first iteration of the inventory system was to prevent the player's movement when clicking on the UI. This turned out to be an easy fix, however, it ended up causing multiple errors when implementing the cross-scene navigation and had multiple layers of error checking implemented to prevent that. While those errors were only during development and wouldn't have been a problem for the players, it was a key pillar for me to keep the project in a state where Unity can refresh scripts in "play mode" as this feature boost the developer's productivity significantly!
The whole inventory behaviour is controlled by a Data Manager which provides static functions to add and remove items from the inventory as well as store other information in the save files such as music and sound volume. It also creates a manager Game Object the first time it is accessed so it doesn't need any setup!
After Luke started working on the Game Design Document and the puzzle design, a few key changes to the Inventory system came to light. Firstly, we wanted to be able to merge items inside the inventory. However, the inventory was scrollable and didn't allow us to drag items. So the first thing I had to change was the inventory UI, allowing individual items to be dragged.
Unity orders components by their order of the hierarchy. This meant that if you drag the items to the left they will show under the items towards the right. This issue was very difficult to resolve as most suggestions online a very naive and don't work very well with Grid items where if the order changes in the hierarchy their order in the UI will also change. My solution, in the end, was to add a wrapper - an empty Game Object around every item in the inventory and an additional empty Game Object at the end (not visible in the screenshots). When an item is being dragged, the sprite is moved to the last Game Object. That way it is the last child and will always be rendered on top of everything, while the wrapper where the item started remains in place to keep the slot empty. I am very happy with the result!
Now that the items can be dragged, I extended the items themselves to allow the definition of a combination and what the combination would yield.

Then followed up with extending the Data Manager to merge two items if they have a combination defined.
In the GIF above, once the items are merged there is nothing under the mouse, so the tooltips get hidden away. However, there was a bug that meant that the tooltip wouldn't update to the new item's description if the items are merged in the opposite order. With a few more tweaks, this issue was in the past!
The second feature required was the ability to use items by dragging them in the world. This feature was once again an extension on the Interactable component and behaved very similarly to the Dialogue Pre-conditions where an extension script can be attached to the Game Object and it will automatically be triggered by the Interactable component. Examples of this behaviour can be seen in the Level Design and Animation & Cutscenes sections.
The last extension was the ability to "auto-merge" items. For the tutorial, we wanted to have the player collect three sticks and combine them with a rope. Since I didn't implement item stacks we needed to find an alternative solution. Since this was the only case where we wanted that behaviour I opted for a workaround solution rather than implementing stacks. My solution was to add a boolean value on an item combination and if set to true the combination will be executed once both items are in the inventory. This solution requires a lot less code than item stacks and I believe it was the right decision for our prototype.
Later in the project, another tweak was required to the system - the Duct Tape item needed to be used with two objects before it disappears from the player's inventory. Initially, I implemented it by adding the option to not destroy an item when it is combined with another item as a property on the combination.

However, this implementation required the puzzles to be sequential. During testing, we found that it was possible to delay one of the puzzles and complete them in the unintended order. This prompted me to completely redo the implementation. Instead of specifying when an item can or can't be destroyed, the developer can now specify how many combinations the item can survive before being destroyed. Now the Duct Tape can be used in any order and the player can progress through the game.
The final change to the Inventory system in the prototype was to render the inventory in the centre of the screen as there was a lot of wasted space. Now the UI looks a lot more polished and easier to look at as it isn't far away from the centre of attention.

The Dialogue System
The second core system in a Point & Click game is the dialogue system - a key to storytelling. There are many iterations by different developers, but we got inspired by Persona 5 (2016) so we went with the character sprite next to the text for the main characters.
The first step was to get the basic structure. A dialogue system would need to have a way to define the dialogues, which would be a lot of work to get the basic foundation. Instead, I opted to install a free asset from the Unity Asset Store (2022) called VIDE Dialogues (Albazcythe, 2018). The asset provides the foundation for defining and running the dialogues without any UI.

Once I had learned how to use the dialogue editor, I extended the Interactable component to support running dialogues. At the same time, I implemented an abstraction, which automatically displays dialogues and manages their state. It allows us to easily trigger a dialogue from anywhere around the game.
After we had a basic dialogue, I extended the system to support player choice. This feature would then be utilised in the Visitor Centre where the player will get a quiz.
The next step for me was to implement the ability to give items to the player as part of a dialogue. This feature was needed as the supporting characters Aria is going to interact with will give her items sometimes. Later in the project, I extended this feature to allow taking items from the player as well as setting progress keys (more on progress keys in the Game progress & data storage section).
Finally, sometimes we can't have multiple dialogues defined and easily accessible on a single object, so I've extended the Interactable component to look for and invoke components called Dialogue Pre-conditions. These components check the game state and change which is the starting node of the dialogue. In the following example, the dialogue defined is the same as the one in the editor screenshot above, however, the completely disconnected part of the dialogue is triggered.
Below you can see the setup of two items having the same setup, but in the GIF they trigger different dialogue steps due to their pre-condition.


Additionally, I made the dialogue UI to calculate its size dynamically, so that it always fits the screen for any resolution.
Later in the project, I realised that creating a new Dialogue Pre-condition component for every single character Aria chats with is a lot of work and most of them can be summarised quite simply. To account for that, I created a general Pre-condition component that allows the developer to assign an item or a progress key and specify which should be the starting node when the given condition evaluates to true. This component saved us from creating between 5 and 10 custom Pre-condition components, which is great!

Another tricky feature I had to implement was the ability to trigger dialogue when the player is trying to merge items in their inventory. Our dialogue system requires the dialogues to be attached to a component (called VIDE_Assign) on a Game Object and to trigger the dialogue the developer needs to get the instance of it. This makes it tricky as the inventory is the items are Scriptable Objects which can't have components attached to them. To go around the issue, I extended the item combinations to record a starting dialogue node and added a Dialogue component to the inventory UI. The dialogue abstraction has access to both during item merging and can trigger a specific dialogue node from the "ItemMerging" dialogue. This approach has one big negative - all item merging dialogues have to go to the same dialogue definition. During the prototype I didn't have time to look for a better solution, but should the development of the game resume, a better approach will be necessary as this can very quickly get out of hand.


Game progress & data storage
An important part of every game (well maybe not microgames) is the ability to retain progress as more often than not they are too long for a single play session. Our prototype offers roughly 30 to 40 minutes of playtime so it is already reaching the boundaries for a single play session of some gamers.
Similarly to other systems in our game, I created a global abstraction for the storage system. This allows anyone to read or write data from anywhere without worrying about managing the state. The abstraction automatically creates a manager Game Object.
Firstly, I made it store the inventory. This was a tricky task as described by Coding With Unity (2019) in their Unity3D - Scriptable Object Inventory System tutorial. I had to create an "Item Database" to assign an automatic index to each item as their Unity-assigned IDs don't persist across runs. Then when loading the items I had to retrieve the correct ScritableObject based on that index. Quite a tricky task to get right without a tutorial!
The second key task was related to the player's location. Every time the player navigates to a new scene, I store the scene name as well as the initial player location. This allows me to spawn the player in the correct scene and the right location if they leave the game and come back. This behaviour can be seen in the Movement and navigation section.
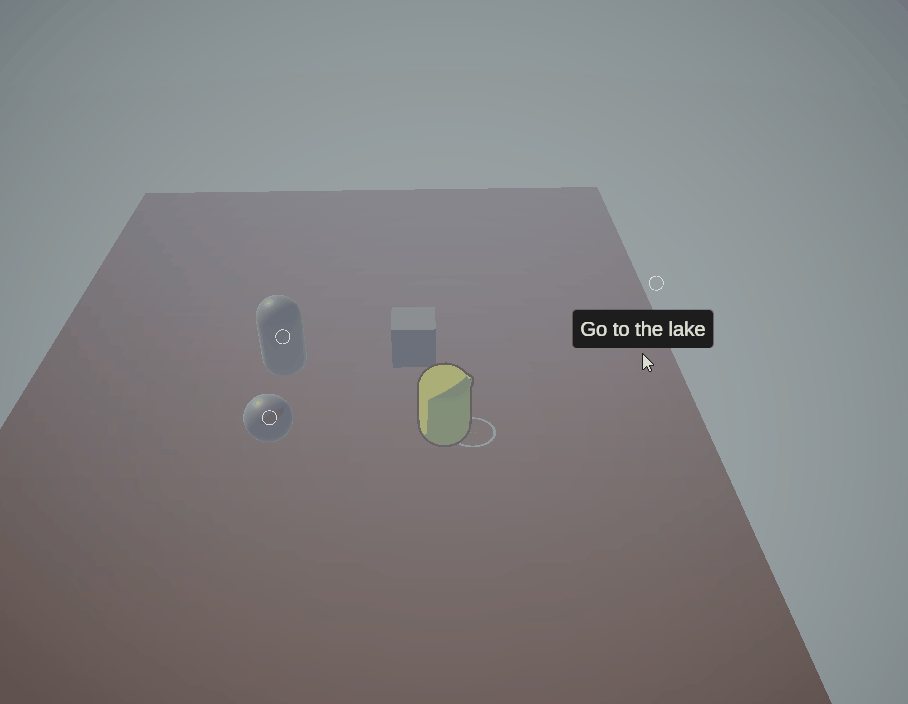
Another important feature was to allow storage and retrieval of arbitrary strings, or as I called them - progress keys. This feature allowed us to store the progress of the player without having to change the logic of the storage system. For example, we store the progress key Stonehenge-CampingArea-TownKnown when Aria speaks to the person at the Camping Area scene (the first scene after the tutorial). This progress key is then checked by the navigation zone to the town and if it is present Aria is allowed to travel, otherwise, a dialogue is triggered where Aria says that she doesn't know the way. Where items aren't involved, this was our way of signifying progress through the game.
This Data Manager abstraction allowed us to minimise the "abstract" progress keys by allowing us to check what items have been collected and what items have already been used. It also updated the UI every time an item is added to or removed from the inventory and generally made our life as developers extremely easy!
Finally, the storage system was extended to store the sound and music volume when the player changes the setting in the Main Menu or the Pause Menu.
Animation & Cutscenes
My first animation task was to give life to Aria. Originally we thought animating in Unity is simple, however, we found that none of the character animation handles Michael created in Maya are visible or usable in Unity. This prevented me from creating animations as there are too many bones to animate independently. To go around the issue, I found a package on the Unity Asset Store (2022) called Basic Motion (Iglesias, 2021) which provided us with basic walking, running and jumping animations.
I took the animations from the Basic Motion package and built the Unity Animation Controller and an animation blend tree for the walking animations. It took some calculations on the velocity of the NavMesh Agent to find the local movement direction, but eventually, all the right animations were playing.


This was the first time I have created cutscenes in Unity, so I had to learn a couple of things. I have played with Timelines in Unreal Engine during the first module of the degree, so I guessed Unity will have something similar and I was right. However, Unity's implementation has a lot to be desired from and they are working on improving them. I didn't use a tutorial but ended up figuring it out quite quickly by myself.
The first cinematic I made was the Tutorial outro. It was a good starting point where I was able to learn the tool and experiment.

The Forecast Forks cinematic which is triggered the first time Aria enters the scene was more dynamic. It required moving Aria and Jason through the NavMesh which isn't something easily achievable through the Timelines feature. Instead, I programmed the cinematic directly in a script. Since that cinematic mostly contains dialogue (and has the longest dialogue sequence in the whole prototype) I didn't record a gif of it.
The most complex cinematic in the game is what we called "Stonehenge Back-in-time". It is a flashback Aria gets once she completes the Stonehenge puzzle requirements. Since it is an alternative version of the same environment, I created the set for this cinematic behind the gameplay are of Stonehenge. Similarly to the main area, Michael had prepared all assets. I had to organise the cultists and animate the scene based on the description Luke has written in the Game Design Document. Additionally, I had to interleave dialogue with the cutscene, which was a little tricky with Unity Timelines as I had to pause the cutscene to play the dialogue.
UI & Accessibility
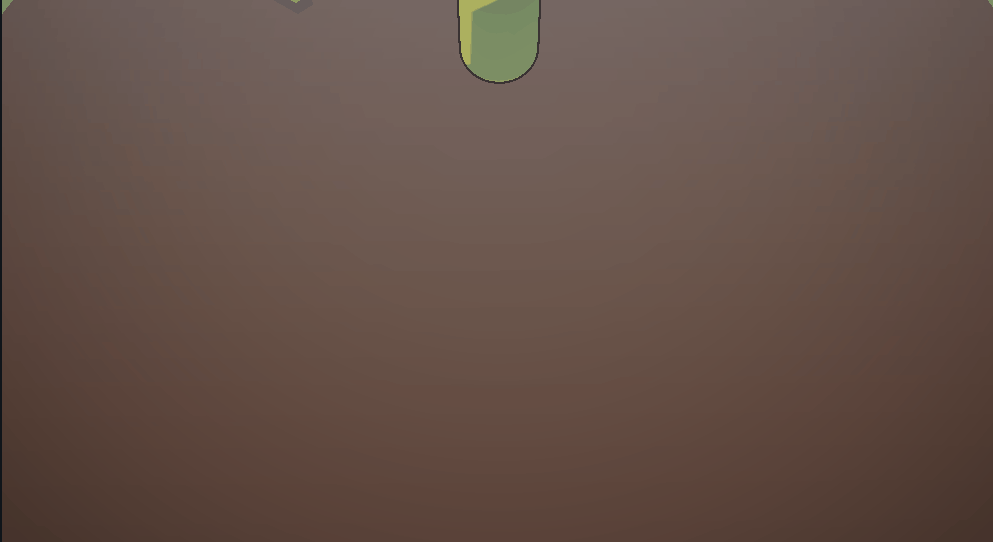
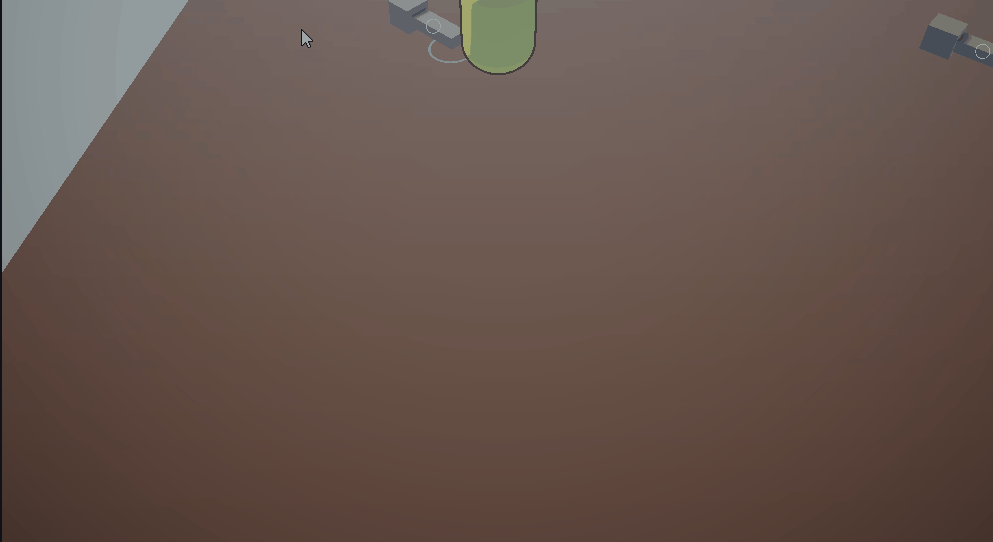
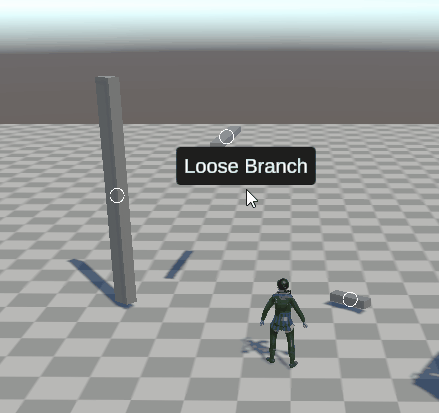
As a key principle for the game, the team wanted to look into and iterate over different ways we can improve on the genre. One common problem with Point & Click games is the difficulty of finding what to interact with for the player, leaving them clicking frantically on the screen in an attempt to find something interactable. To address this, we decided to put a small marker over the interactable objects to highlight them to the player.
To achieve this, I've created an Interactable Highlighter, which automatically detects and renders a small sprite in front of the interactable objects. Additionally, it casts a ray from the camera to the object, allowing it to hide the sprite when there is an obstacle on the way.


It was quite late in the project when we realised that we still have no menus. I took on the task and created a simple Main Menu and Pause Menu. Both of them share the same Settings prefab, so we have a consistent view across the different parts of the game.


Level Design
The very first level design task I worked on was blocking out the Lake scene. It was the first time I am not "just playing" with the Unity Terrain system and I had a lot of fun shaping the level. For the lake in the scene, I used the URP Stylized Water Shader (BitGem, 2021) which I utilised in the previous course as well.

It is important to note that all 3D assets have been created by Michael unless stated otherwise. My level design work involves shaping the terrain and organising the assets across the scenes as well as implementing the different interactions as per Luke's Game Design Document.
Soon after, I realised that the sooner we have the levels the sooner we can start to slowly build the game, giving us a wider surface for "I'm just gonna tweak that" work. I went through the Game Design Document and created very basic scenes for each area we will have in the game and added the items and navigation zones it will have as well some of the interactions in them.


Once the mocks were ready, we were in a place where multiple people could work on separate scenes and do small incremental changes to them without feeling overwhelmed by having to do the initial setup. From there, I started work on the Tutorial, polishing the behaviour and looks of the level.


The tutorial was one of the most important pieces of our prototype as all players will start from there so it will be seen by most players. I wasn't sure how to prioritise the scenes after that, so I simply started working on them in order of appearance through the game. The next scene in line was the Campsite Area, which I worked on in a similar way as with the tutorial - polishing the behaviour and looks.


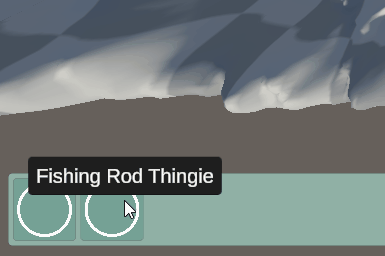
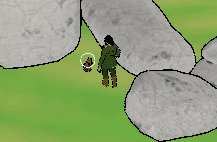
One of the most complex interactions in the game is in the Camping Area. In it, there is a dog that has a pet cone that you need. However, the BBQ grill where you need to get some meat from for the dog is behind it. The player has to get a fishing rod from the nearby lake and use it to fetch the meat, which will in turn calm the dog. The dog itself would stay calmly while Aria is away, but start barking at her if she goes near it. Once Aria tosses the meat, the dog would go chew on its treat leaving her alone. This interaction involved multiple stages and multiple objects responsible for different stages of the interaction.


Grabbing the meat from the BBQ Grill wasn't easy. The Interactable component works by detecting when the player enters its collider and the same collider is used for detecting when the mouse is over the Game Object. I didn't want to BBQ Grill tooltip to appear in a giant area around it, so I implemented a component I called Remote Interaction. This component let me create a zone that triggers the interaction when the player enters it while ignoring all other rules and the player still has to click on the Interactable component itself. This component ended up used in many places where the player would have to use items from an unrealistic distance without it.

Positioning the two navigation areas in the Camping Area was a difficult decision to make. I wanted to have some additional signing in the area to help the player. To spare Michael from additional work, I created a small signpost with two arrows that utilise the Interactable component to display tooltips to the player.

Since many of our environments are situated outside, we wanted to have some grass. For that, I included Brute Force - Grass Shader by Brute Force Studio (2021).


I was quite pleased with the result, however, my teammates weren't happy with it so we pivoted to using an environment asset Luke bought from the asset store. I took the asset and reworked the scene with the new environment asset, adding trees and redrawing the terrain textures.

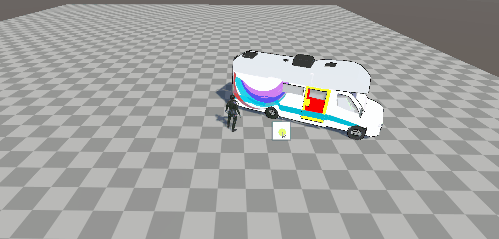
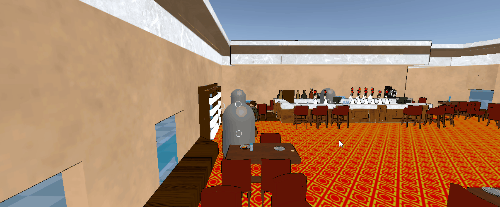
After the Lake scene was complete, I moved on to the Forecast Forks as the Town assets were still in progress by Michael. Forecast Forks is a pub, inspired by Wetherspoons. For this environment, I didn't have to create a terrain as it is entirely inside a human-made structure - a building in a town. It was great fun organising the furniture, cutlery, plates and glasses around the interior.


The Forecast Forks pub also has one of the most interesting interactions (at least to me) in the game - the drunk man stopping Aria from leaving.
Once the Town assets were complete, I added them to the outside of the Forecast Forks and began work on the Town scene.

In the back alley of the town, Aria gets to meet the Slime. It will be a recurring part of the cast, however, in the prototype, this is the only place where it appears.
From the town, the player can reach the Visitor Centre on their way to Stonehenge. In the Visitor Centre, the player gets to chat with the lady behind the counter. She asks the player for money (which Jason gives Aria in Forecast Forks) for tickets and allows her to do a quiz for the Stonehenge branded mug as Aria would now be out of money.
The Visitor Centre is open out to the outside so I had to create some terrain in the background that would lead to Stonehenge.


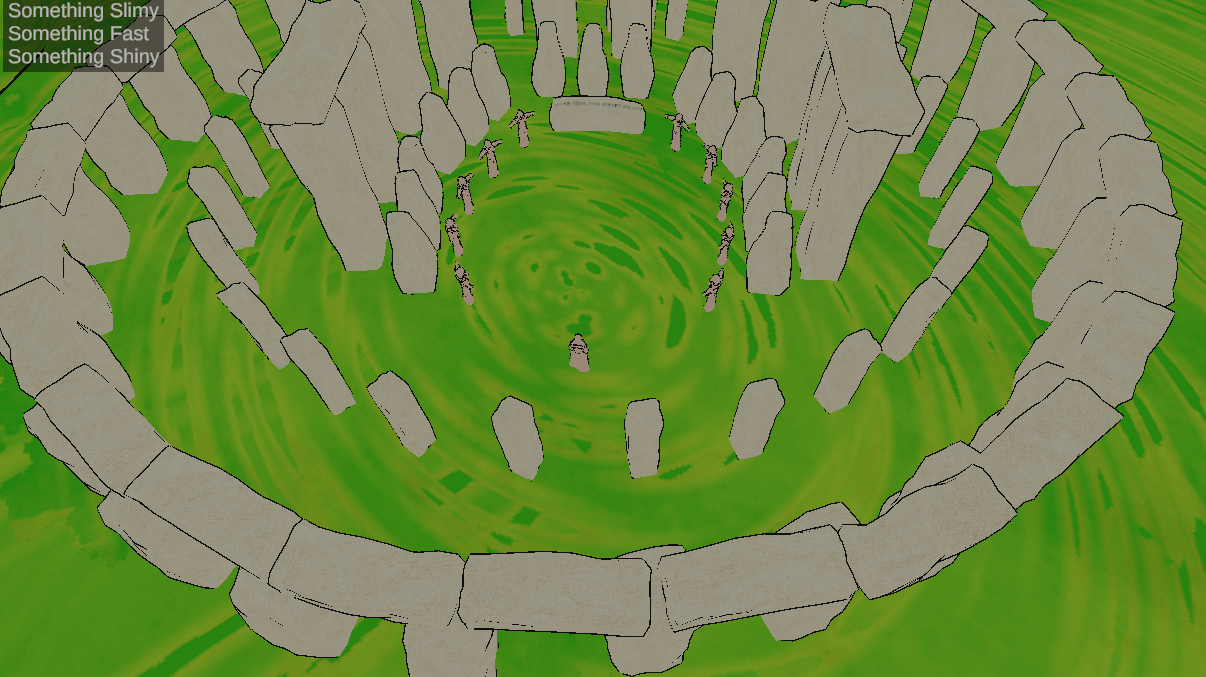
After the Visitor Centre was complete, it was time to move on to the most iconic area in the prototype - Stonehenge. Michael has created the environment for it so I didn't need to work on terrain for it. In the final zone, the Cavern under Stonehenge has a special requirement for it to open up. It requires the Coin from the Lake, the Slime (which doesn't physically follow Aria due to time restrictions) and the Coffee to be given to the lazy squirrel. Once all of the requirements are met, the player will be greeted by a cutscene (see the Animation & Cutscenes section) and the path to the Cavern under Stonehenge will open.


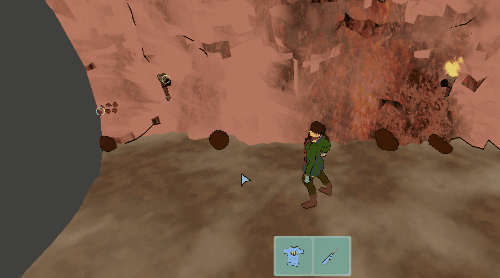
Last, but not least, was the Cavern scene. This scene required some interaction with light as the player will be asked to light up a torch on the wall. Unfortunately, the shader Luke found us doesn't support traditional lighting, so I had to improvise by creating spheres of a dark colour to obstruct the player.
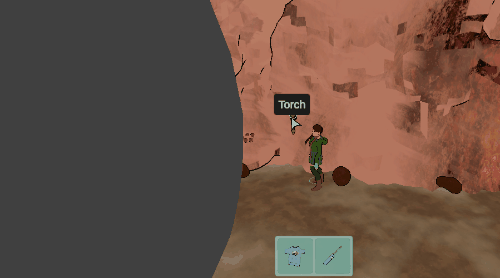
Once the darkness has been lit by the torch, the player will see a set of strange rocks on the wall. This is the final puzzle where the player has to press the stones in the right order. The order is foretold by runes on the wall of the cavern (not present in the gif below as they were added later in the project). Once they solve this puzzle a magical door would appear which ends the prototype once the player interacts with it.
2D Art
Our inventory UI had sprites for each item from day 1 of its implementation. However, none of the team members admitted to being particularly good at drawing 2D art. I took the task as I've always wanted to learn to draw and finding things to draw has been the hardest challenge in the process for me. I am extremely pleased with how the icons turned out.
To give the game a more polished look, I drew a custom cursor and an icon utilising the full logo Luke and Michael created as a starting point.

As I started working on the Pitch presentation, I created a custom background for it to give it more character.
From there, I moved on to drawing the 5 Steam title images, which were great fun to come up with and draw.
Sound & Music
Late into the project, I picked up the task to add sound and music to the game. Since I was busy with creating the marketing material for the game, I asked Michael to look for the assets based on a list of things we might want to add sounds for. He found a large collection of sound effects and music from Bensound (Bensound.com, 2022). Some of the sounds were too long and weren't ready to be put in the game yet, so Michael trimmed them and prepared them. Once complete, I took the sounds and added them to the game. To do that, I extended the Interactable component to support sound effects as well as added custom logic to some more complex interactions which couldn't be satisfied with the Interactable component logic. Lastly, I added the music in the background.
To complete the feature, I integrated the Settings Menu sliders with the Audio Mixers so that the player can control the volume.
Document contributions
An important part of any document is the tone of voice. It influences the perception regardless of whether it is an internal document or an external marketing piece. Luke and Michael wrote down the Game Design Outline (we called it Game Design Brief) and they did a great job at that. However, I felt the uncertainty in the language didn't give us a solid foundation to build the game on, so I went over suggesting corrections to things I knew we'd discussed and left comments on lines where we still needed to make a decision. It was quite a long list of changes, but I believe the document ended sounding a lot more professional and posed as a solid (and certain) foundation for building the GDD and the game on top.
While working on the different systems, I've created a couple of documentation docs that were aimed at Luke and Michael to allow them to work with the Inventory and Dialogue systems as well as show them how to properly import objects in Unity (2022) and change their materials with ones using our custom shader. You can view the documentation below.
Collaboration & Workflow
While the first weeks of the project were mostly focused on the initial setup of the project and creating the business plan, the team kept in touch and we had a lot of discussions around the story direction and work distribution. Luke and I discussed how we would split the level design, which ended up being taken mostly by me due to Luke being busy with creating the dialogue and puzzle design. You know what they say - Plans are worthless, but planning is everything (Eisenhower, 1957).
Apart from contributing to team discussions, I've also helped Michael with a quick introduction to Unity as he was mostly an Unreal Engine (2022) developer. He agreed to use Unity as both Luke and I are focusing a lot on mastering Unity and most of the work in the engine would be done by us.
Bugs & Polish
While playtesting, we noticed the game was freezing for a few seconds the first time a dialogue was triggered. This was due to the asset loading all dialogues the first time it is interacted with. This, of course, was not a great player experience, however, it wasn't a simple fix as there was a bug in the asset itself. When the game calls VIDE.LoadDialogues (the function that loads all dialogues into memory) the game would crash. Since the asset is free this bug has been there for years. Fortunately, the asset comes with its source code and I was able to find the bug and fix it. Now there is a long loading time between the Main Menu and the first scene loaded but after that, all dialogues trigger instantaneously.
I tried to fix as many known bugs as possible, however, not all were easily resolvable. I wanted to show one of them, which had me laughing out loud when I first saw it. Meet Aria, the tap dancer!
Marketing
Since the deadline was fast approaching, I started to work on the marketing material for Essencebound. Firstly, I worked on the Steam page. Since the game was too big to finish over the module, we decided to mock all marketing material. To do that, I utilised my experience as a Web Developer and created a local clone of a Steam page. Randomly, I took the page of a game called Sigh of the Abyss: Shadow Bonds which is due to release in 2022. This local copy of the page allowed me to iterate over the content we would put on the page without increasing my work a lot compared to other approaches I could have used.
My first step was to change the name of the game.

I came up with the short description on the right, while Michael helped me with the text for the long description. We needed to structure it in a visually pleasing way, so I took inspiration from other games and added title images. More on how I created those in the 2D Art section.


Lastly, I updated the game screenshots with screenshots from the game. We would have used a video on the page, however, mocking it would have taken more time so we opted for the simpler approach due to the time constraints. To take the full page screenshots I used the build-in Chrome Dev Tools feature.

For the press kit, I used the NineWitches press kit (Ninewitches.com, 2022) as a starting point and inspiration. I updated all details with ones relevant for Essencebound and wrote a description of the game inspired by the Steam description Michael wrote, keeping a similar tone of voice. Lastly, I updated all images with screenshots of Essencebound.

After the press kit, I moved on to the press release. I looked a lot as to what is required for it and found some conflicting descriptions of it. In the end, I decided to trust the Press Release Template by Indie Game Girl (Jonassen, 2014). The most difficult part of this document was the developer quotes section which I tried to relate to the disciplines each of us is responsible for.

For the social media presence, I received help from Luke, who wrote down the Twitter (2022) posts and YouTube (2022) video titles. I used a similar approach to our Steam page to mock the two websites. Due to the way Twitter's website works it was very difficult to mock, so I opted to focus on single posts instead. I also had to record a custom GIF of the Stonehenge scene to make the post more engaging and entertaining.


Lastly, I had to create thumbnails for the YouTube (2022) videos. I tried to simplify my work by using already created screenshots for backgrounds and utilising assets already created for the game.

Pitch
Initially, Luke and Michael started working on the pitch as I was too busy with the level design of all levels and putting all interactions in them. When I joined I worked a lot on introducing consistency across the slides in terms of tone of voice as well as design. I introduced a custom background to the presentation to make everything "ours". More on how I created it in the 2D Art section.

Given more time, I would love to animate the background. I don't want to have it actively moving as that will distract the listeners, but have it passively change through the presentation. This would show a high level of attention to detail and would look great, however, such a task would have taken multiple days to complete and isn't feasible for this module.
When I started to assist with the writing of the pitch deck, I first focused on the consistency and format of the presentation. Luke and Michael have done a great job on many of the slides at this point, however, many of them had big sections of text and weren't structured similarly to one another. I reworded many of the slides into bullet points, summarising the content while moving the block of text into the presenter notes. Additionally, since the background I added has visual elements, I tried to keep all text and images off of the right side of the slides. Lastly, I added gameplay screenshots and GIFs across the presentation.
Some of the slides I worked on (more than tiny tweaks) include "What is Essencebound", "The Story Of Essencebound", "Meet the Characters", "Art Direction", "High-level Roadmap", "Similar Games", "Marketing" and "Recap".

Conclusion
This project has been an exciting journey for me. During the development, we trimmed the scope multiple times to make it fit in the timeframe we had and we still had to finish bits around Christmas. However, I am extremely proud of our achievement as this is by far the longest game I have ever created with roughly 30 minutes of playtime for new players and speedrun of just under 9 minutes. A solid portfolio entry for all of us!
References
`2022. GitHub. GitHub Inc.
`2022. Unreal Engine. Epic Games Inc.
`2022. Unity. Unity Technologies.
Abhinav a.k.a Demkeys, 2017. Ripple Effects | Unity Particle Effects | Visual FX Tutorial. [online] Youtube.com. Available at: https://www.youtube.com/watch?v=byxivSC1xYM [Accessed 2 January 2022].
Albazcythe, 2018. VIDE Dialogues. [online] Unity Asset Store. Available at: https://assetstore.unity.com/packages/tools/ai/vide-dialogues-69932 [Accessed 2 January 2022].
Atlus (2016) Persona 5 [online] Console. Sega
Bensound.com. 2022. Royalty Free Music by Bensound | Stock Music. [online] Available at: https://www.bensound.com/ [Accessed 4 January 2022].
BitGem, 2021. URP Stylized Water Shader. [online] Unity Asset Store. Available at: https://assetstore.unity.com/packages/vfx/shaders/urp-stylized-water-shader-proto-series-187485 [Accessed 3 January 2022].
Brackeys, 2018. Unity NavMesh Tutorial - Basics. [online] Youtube.com. Available at: https://www.youtube.com/watch?v=CHV1ymlw-P8 [Accessed 2 January 2022].
Brute Force Studio, 2021. Brute Force - Grass Shader. [online] Unity Asset Store. Available at: https://assetstore.unity.com/packages/vfx/shaders/brute-force-grass-shader-192388 [Accessed 3 January 2022].
Coding With Unity, 2019. Unity3D - Scriptable Object Inventory System. [online] Youtube.com. Available at: https://www.youtube.com/watch?v=_IqTeruf3-s [Accessed 2 January 2022].
Dont-nod.com. 2022. DONTNOD Entertainment – Video games studio. [online] Available at: https://dont-nod.com/ [Accessed 1 January 2022].
Eisenhower, D., 1957. Public papers of the presidents of the United States. United States: Government Printing Office.
Frozenbite (2009) Trine. [online] PC. Nobilis
Iglesias, K., 2021. Basic Motion FREE. [online] Unity Asset Store. Available at: https://assetstore.unity.com/packages/3d/animations/basic-motions-free-154271 [Accessed 3 January 2022].
Jonassen, E., 2014. A Press Release Template Perfect for the Indie Game Developer. [online] Indie Game Girl. Available at: https://www.indiegamegirl.com/press-release-template/ [Accessed 4 January 2022].
Ninewitches.com. 2022. Nine Witches: Family Disruption - Press Kit. [online] Available at: https://www.ninewitches.com/press-kit [Accessed 4 January 2022].
Owlcat Games (2018) Pathfinder: Kingmaker. [online] PC. Deep Silver
Telltale Games (2013) The Wolf Among Us. [online] Console. Telltale Games
Twitter. 2022. Twitter. [online] Available at: https://twitter.com/ [Accessed 4 January 2022].
Unity Asset Store. 2022. Unity Asset Store. [online] Available at: https://assetstore.unity.com/ [Accessed 1 January 2022].
Unity Technologies, 2022. Cinemachine. [online] Unity. Available at: https://unity.com/unity/features/editor/art-and-design/cinemachine [Accessed 2 January 2022].
Youtube.com. 2022. YouTube. [online] Available at: https://www.youtube.com/ [Accessed 4 January 2022].
If you like it, share it!